Who is this guide for?
Artists & Photographers
Sell your own artwork or photography with interactive frame and mat options for customers.
Custom Framers
Let customers upload their own photos and visualise them inside your frames before buying.
New Employees
Use this guide to understand the full onboarding flow before supporting customers.
Before You Begin
Make sure you have the following ready before starting:- An active Shopify store with admin access
- At least one product published in your store (used for testing the preview)
- The LIVEARf app installed from the Shopify App Store
LIVEVUE runs entirely inside your Shopify admin. You do not need a separate account or login beyond Shopify.
Setup Steps
Open LIVEARf in Shopify
Once installed, open the LIVEARf app from your Shopify admin. Go to Apps → LIVEARf - Art Framing in the left sidebar.You will land on the LIVEARf Dashboard showing your Theme Block Status and quick-start options.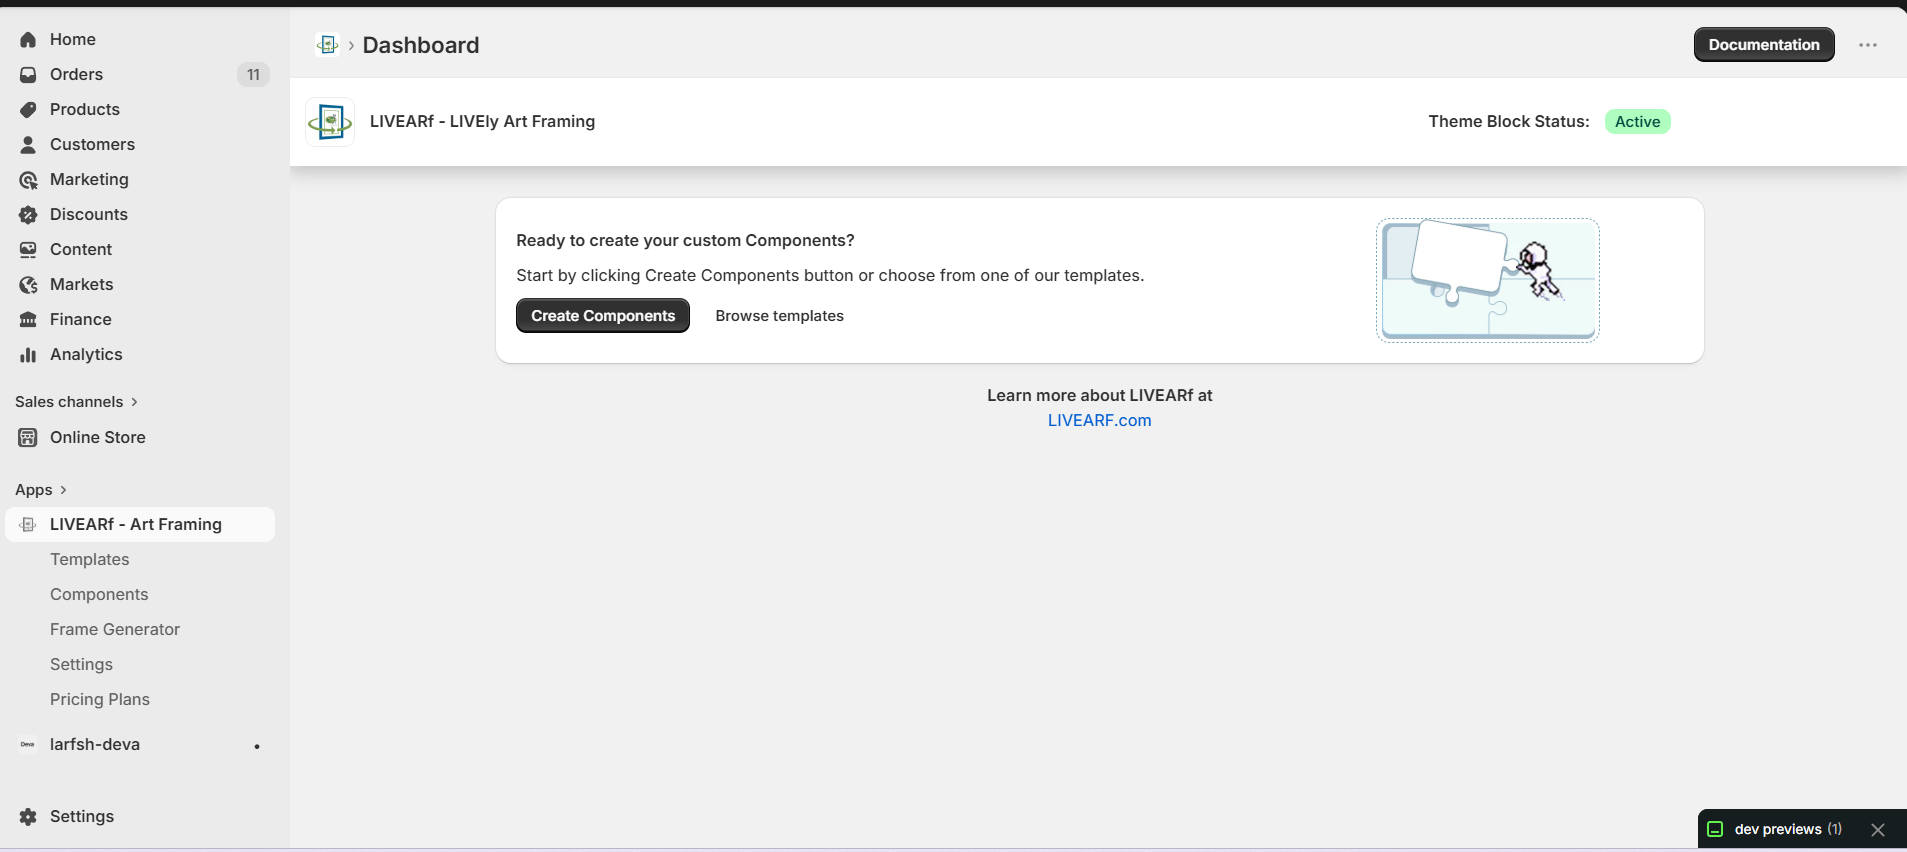
Accept Terms & Generate Sample Data
The next screen shows the Terms and Conditions. LIVEVUE will create temporary sample data in your store — this lets you preview the full experience without touching any of your real products.Sample items that will be created:
- Sample images on file
- A Sample Preview Product (unlisted — invisible to customers)
- Sample Collections
Select Your Business Role
Choose the role that best describes your business. This determines which default component and options get pre-loaded for you.
Select your role, click Save, then click Next.
| Role | Best for |
|---|---|
| Artist / Seller | Selling your own paintings, prints, or original artwork |
| Framer / Seller | Custom picture framing services |
| Photographer / Seller | Selling digital photography or photo prints |
Not sure which to pick? Artists and Photographers should choose the Artwork Component path. Framers and print-on-demand businesses should choose Upload Component. You can always create both types of components later.
Review the Visualisation Reference Video
A reference video is shown at this step. It demonstrates exactly what your customers will see — how the frame, mat, and size options update the artwork preview in real time.Watch the full video before moving on. It gives you a clear picture of the end result you are building toward.Click Next after watching.
Create a Sample Component
This is where you choose your component type. You will be taken to the Templates screen.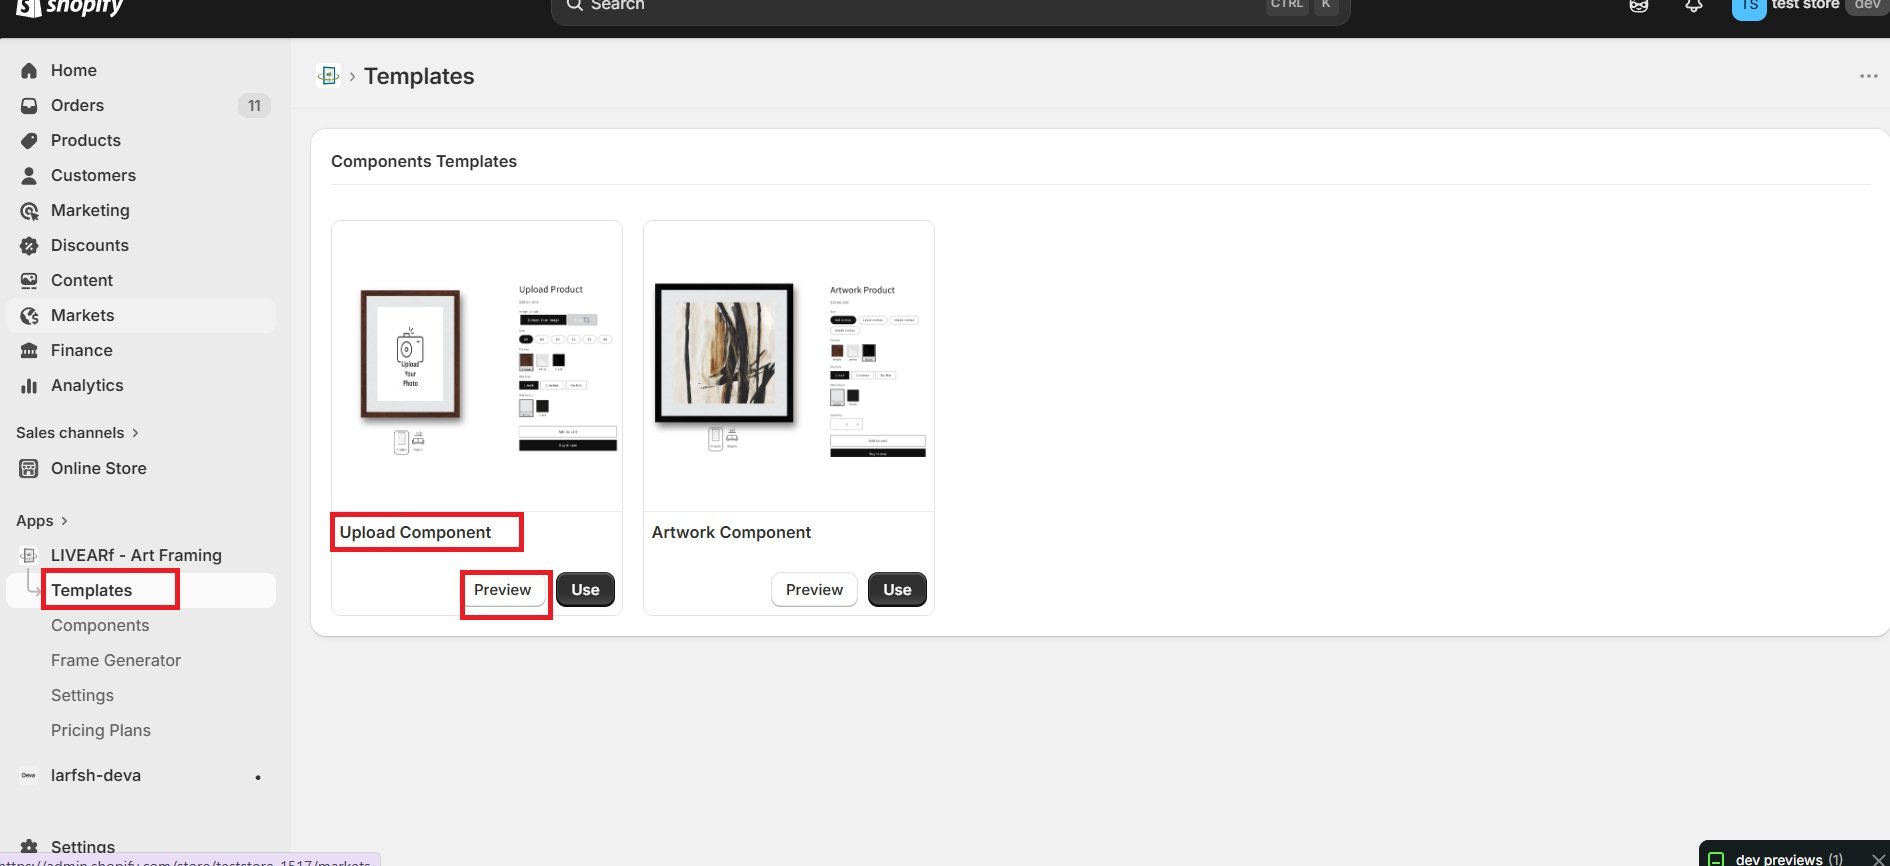
Click Preview first to see the customer-facing experience, then click Use to select it.A popup will appear with auto-generated sample frame and mat options. Click Save to confirm.
| Component | Choose if you are… |
|---|---|
| Artwork Component | An Artist or Photographer with pre-made work |
| Upload Component | A Framer or print-on-demand business |
Create & Enable the LIVEVUE Template
A template is what connects LIVEVUE to your Shopify product pages. Without an enabled template, customers will not see the visualisation on your store.
- Click Create — your LIVEVUE template generates automatically
- Click Enable to activate it
- A Shopify window opens — click Save in the top-right corner
- You will see the template listed with an Enabled status
If the template shows Enabled status, this step is complete.
Link the Template to a Product
Now connect your template to an actual product so you can preview the full experience.Use the Switch Template feature to assign your LIVEVUE template to a product. Then click Preview Product to verify everything is working.You should see the product page update in real time as you change size, frame, and mat selections — this is exactly what your customers will experience.
Setup Complete
LIVEVUE is now enabled and connected to your store. 🎉From here you can:
- Build your own custom components tailored to your specific products
- Link components to individual products, entire collections, or all LIVEVUE-enabled products
- Configure advanced pricing rules, conditional logic, and frame styles
Your store is ready. Choose your next step below based on your business type.
What’s Next?
Artwork Component
For Artists & Photographers. Set up frame, mat, and size options for your pre-made artwork.
Upload Component
For Framers. Let customers upload their own photos and visualise them framed.