What is the Frame Generator?
The Frame Generator converts your frame strip images into fully usable frame visuals that appear in the live preview on your product page. It has two modes — 2D for flat, lightweight frame visuals and 3D for depth-accurate, realistic frame rendering.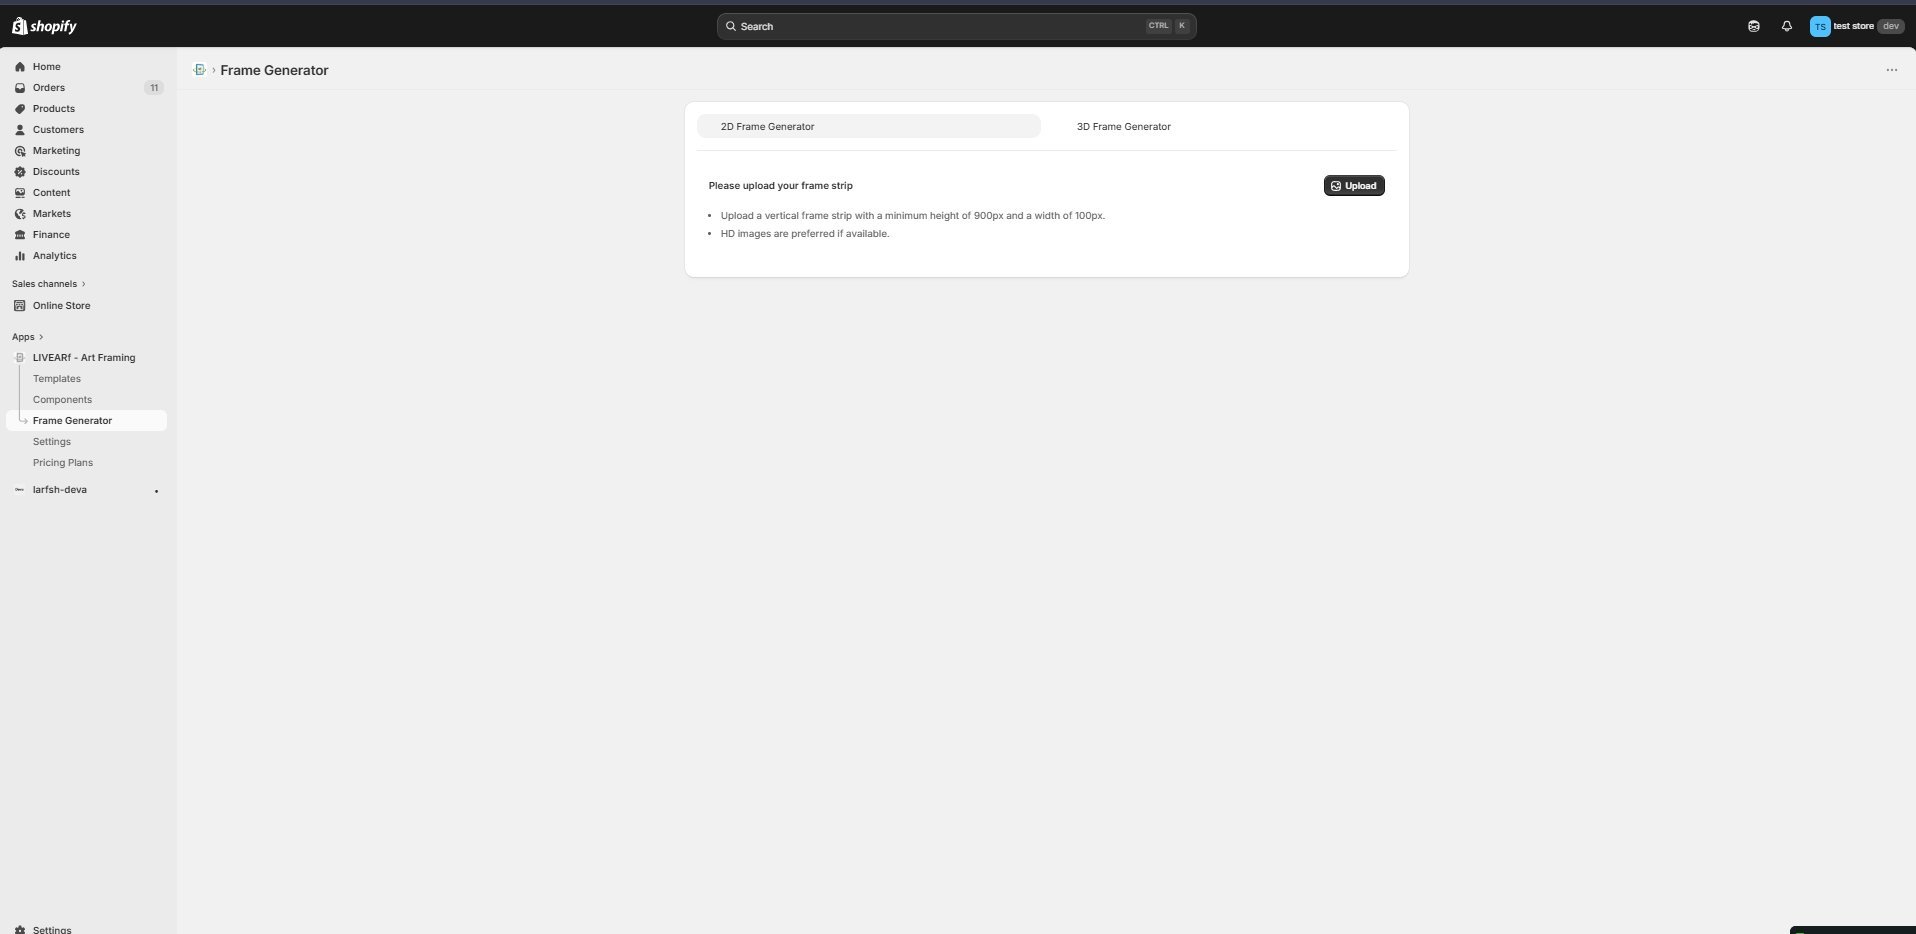
2D vs 3D — Which should you use?
| 2D Frame Generator | 3D Frame Generator | |
|---|---|---|
| Best for | Standard frame previews, faster setup | Premium or custom frames where depth matters |
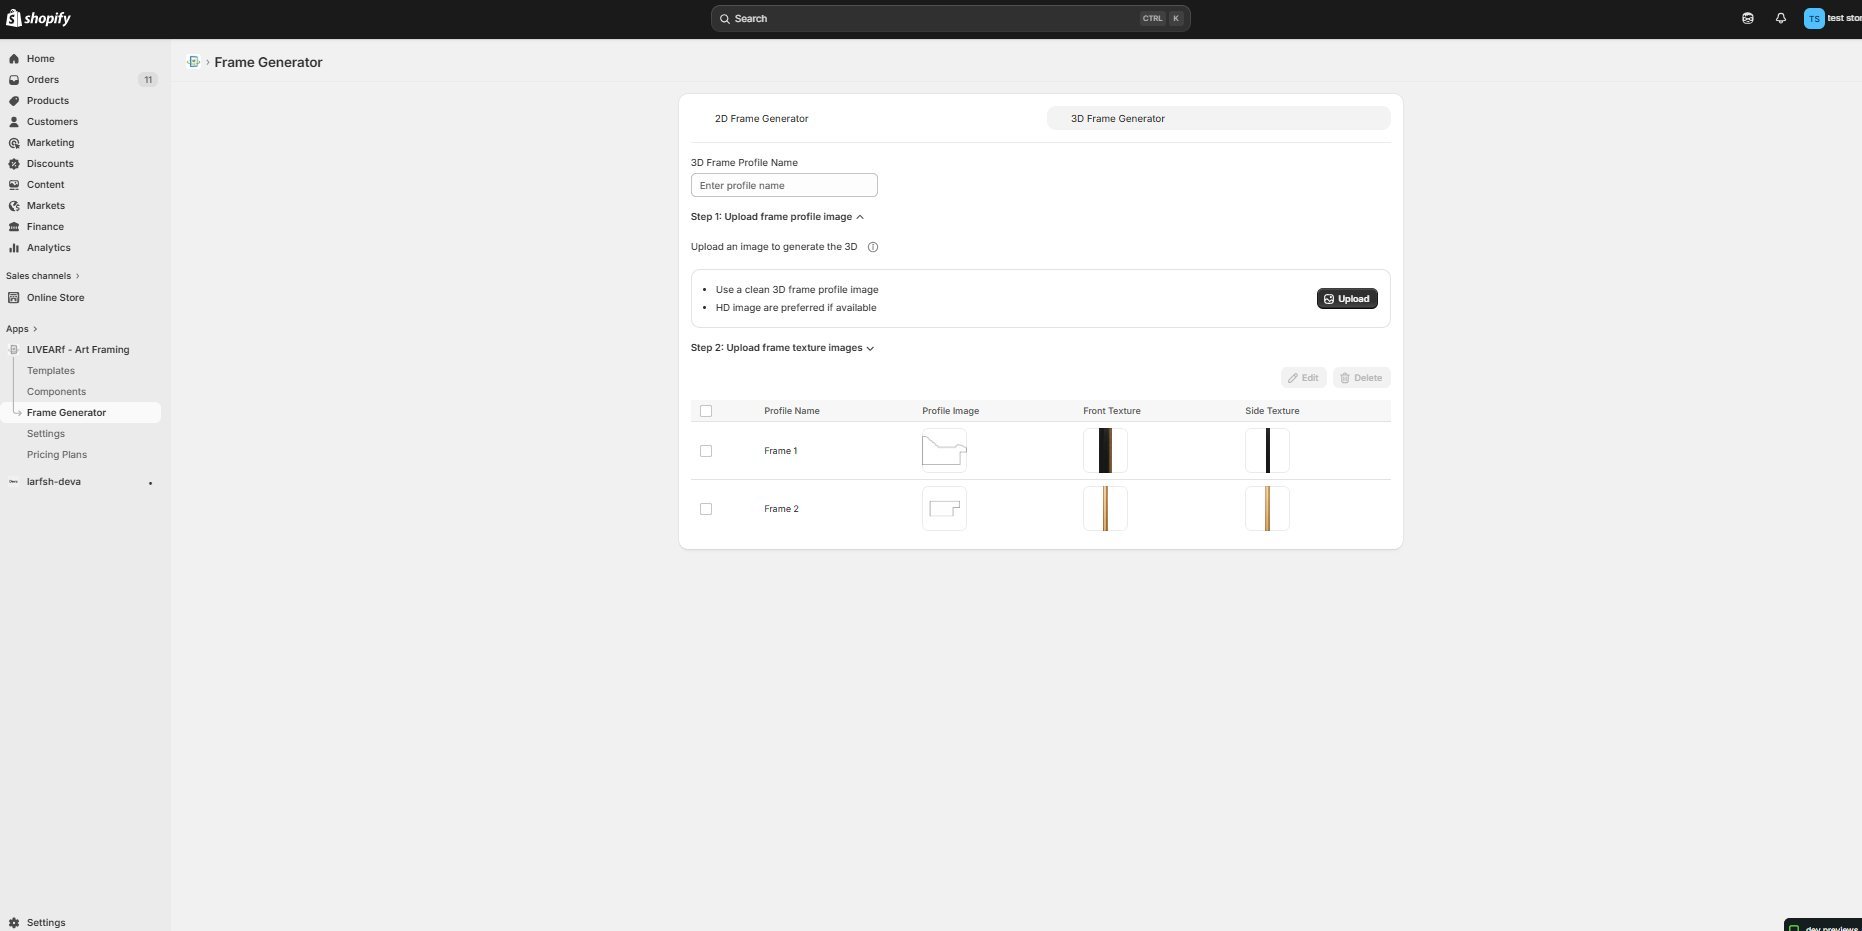
| What you need | A single vertical frame strip image | A profile image + front and side texture images |
| Setup time | Quick — upload, crop, generate | Longer — requires profile + two textures |
| Visual result | Flat, front-facing frame wrap | Realistic depth with visible frame profile |
| Recommended when | You have one frame strip image available | Frame depth and profile shape are important |
2D and 3D Frame Generator
- 2D Frame Generator
- 3D Frame Generator
Step 1 — Open the 2D tab and click Upload
Navigate to Frame Generator in your LIVEARf app sidebar. The 2D Frame Generator tab is selected by default. Click the Upload button in the top right.Before uploading, make sure your frame strip image meets these requirements:
- Vertical orientation
- Minimum height: 900px
- Minimum width: 100px
- HD images preferred for best results
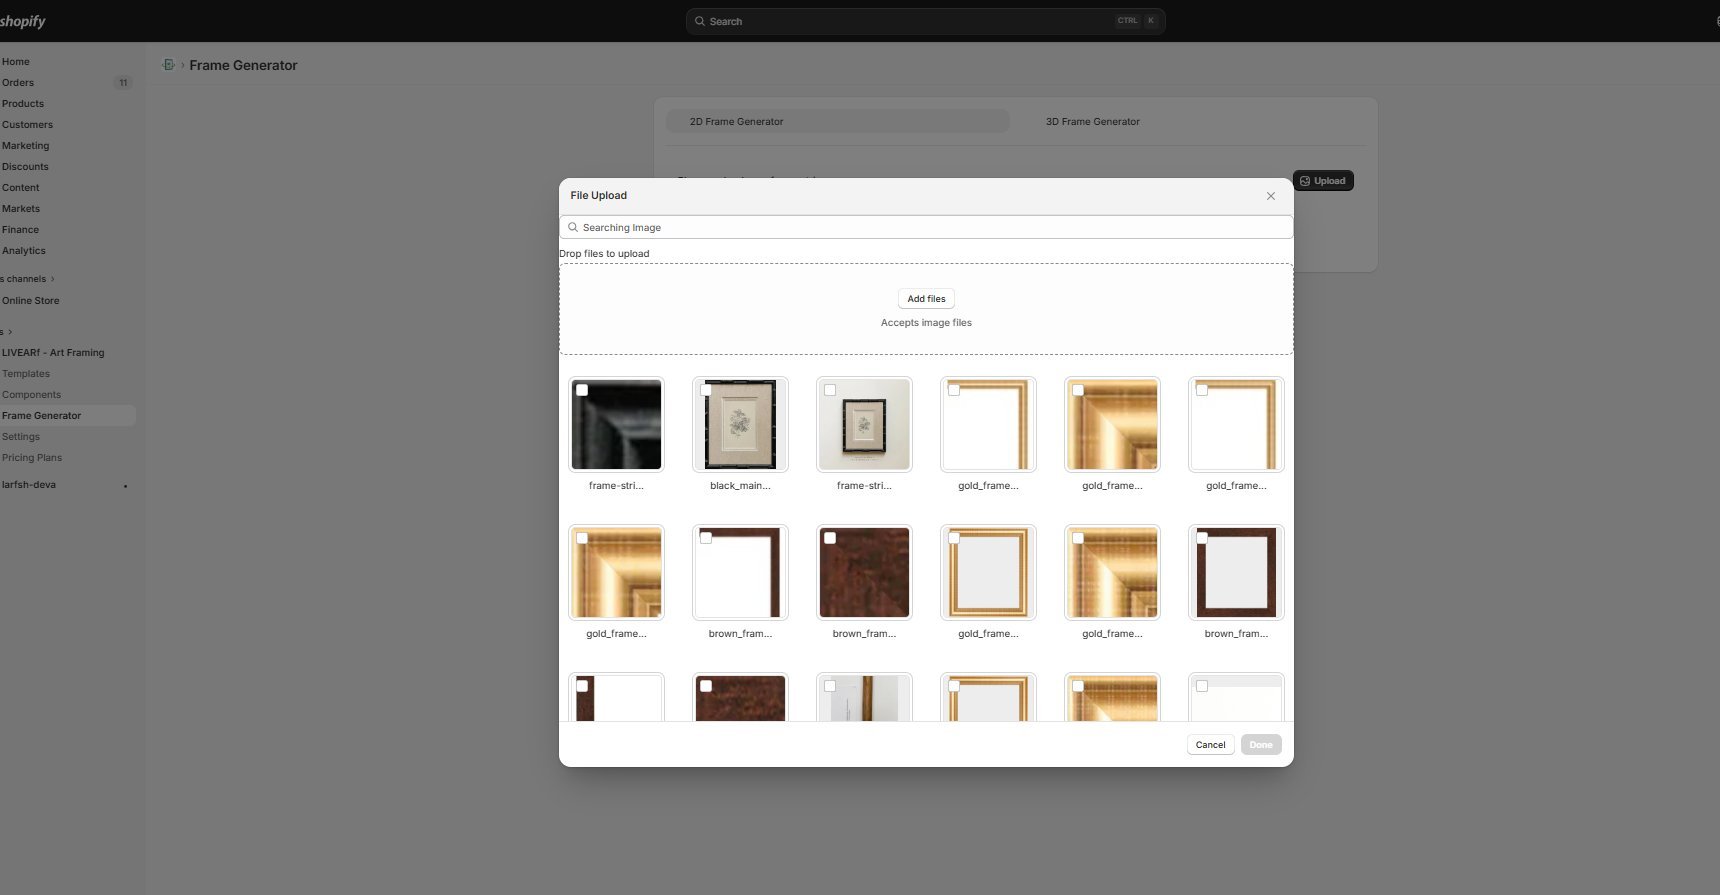
Step 2 — Select or upload your frame strip
The File Upload popup opens. You can either:- Drag and drop a new frame strip image directly into the upload area
- Click Add files to browse your computer
-
Select an existing image from your frame library shown in the grid below
Step 3 — Crop the image and configure frame settings
After uploading, the crop tool appears. Use it to define exactly which part of the strip to use as your frame.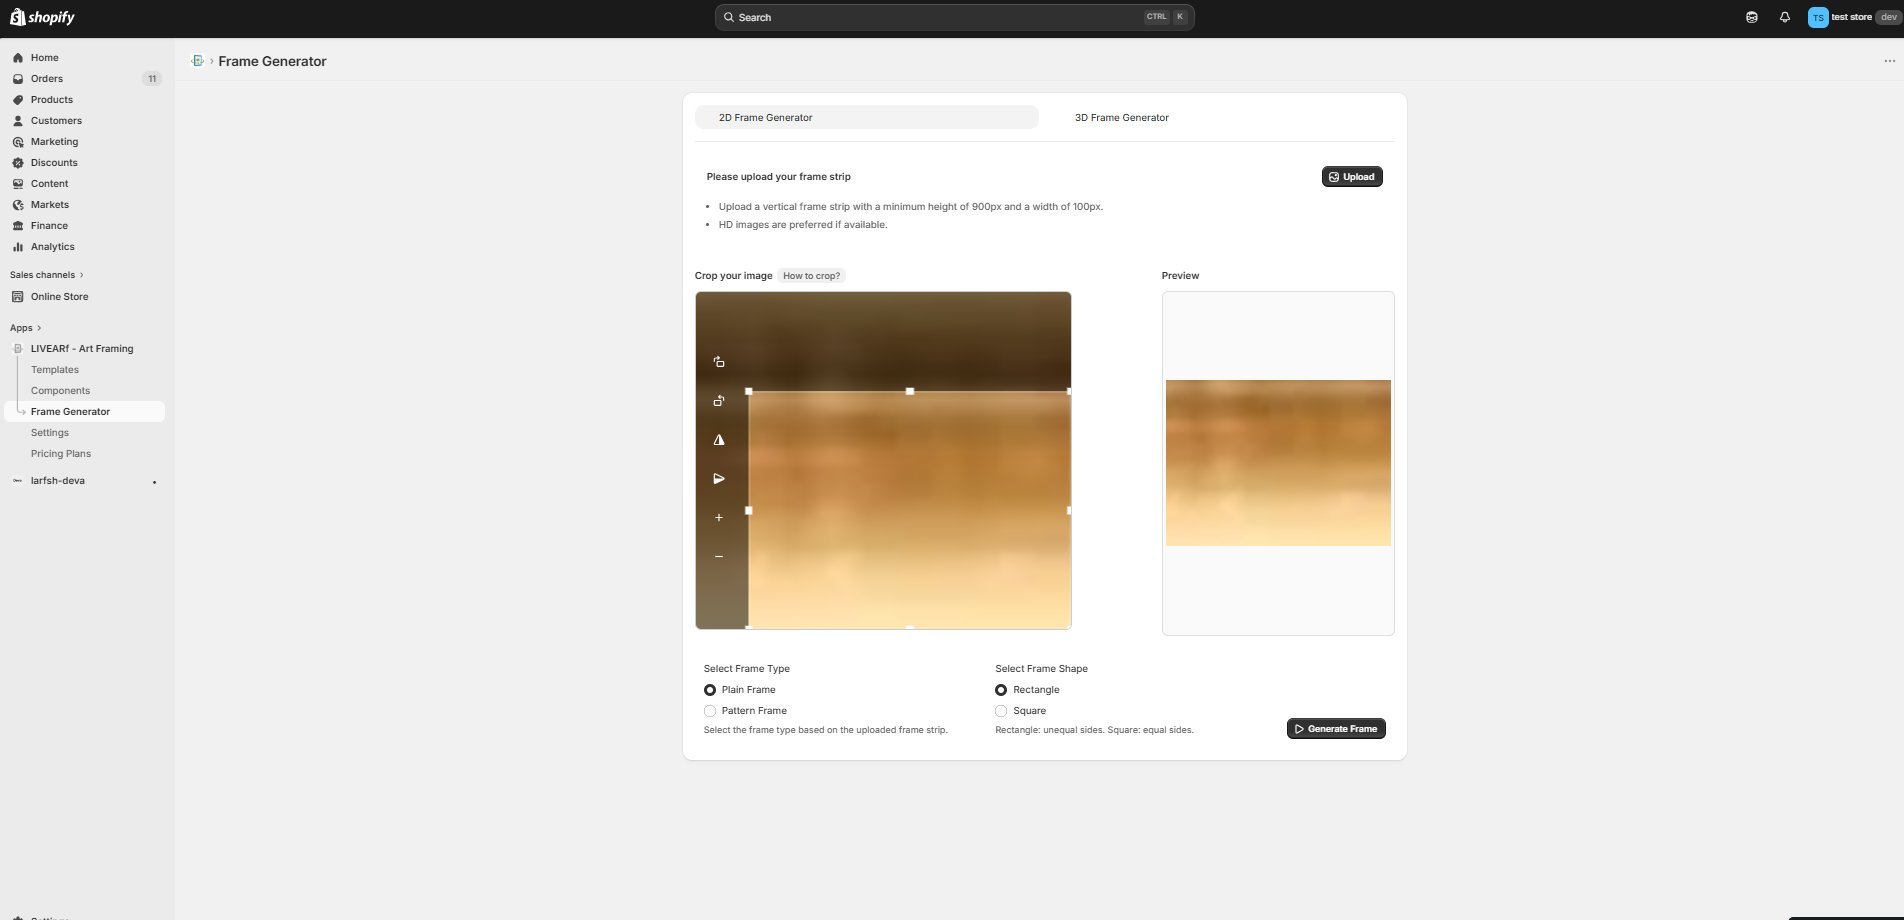
- Drag the crop handles to adjust the selection area
- The Preview panel on the right updates live as you crop
- Use the zoom controls ( + / − ) to get precise
| Setting | Options | What it means |
|---|---|---|
| Frame Type | Plain Frame / Pattern Frame | Plain = solid colour or simple texture. Pattern = repeating design (e.g. ornate, carved). Select based on your strip image. |
| Frame Shape | Rectangle / Square | Rectangle = unequal sides (standard portrait or landscape). Square = equal sides. |
Step 4 — Review generated frames and save
LIVEVUE generates multiple frame corner variations from your strip. Review and select the ones you want to use.
- Left panel — full frame preview showing how the selected corner image wraps around artwork
- Small Corner Images — smaller corner variations for use with smaller artwork sizes
- Large Corner Images — larger corner variations for use with larger artwork sizes
Your 2D frame is now saved and available to assign to a Frame option value in your Artwork or Upload Component.

Using Generated Frames in Your Components
Once a frame is generated and saved, here is how to assign it to your product:- Go to LIVEARf → Components and open your Artwork or Upload Component
- In the Options Panel, click on your Frames option
- For each frame option value, click the edit icon and select your generated frame image as the Main image and Thumbnail
- The frame will now appear in the live Preview Product and on your storefront
Image Requirements & Common Mistakes
| 2D Frame Generator | 3D Frame Generator | |
|---|---|---|
| Minimum size | 900px height × 100px width | No minimum — HD recommended |
| Orientation | Vertical strip | Profile image — straight on, no angle |
| Format | Any image file | Any image file |
| Quality | HD preferred | HD required for clean 3D render |
| Mistake | What goes wrong | Fix |
|---|---|---|
| Uploading a horizontal strip for 2D | Frame wraps incorrectly around artwork | Rotate image to vertical before uploading |
| Choosing Pattern when strip is plain | Tiling artefacts appear on frame | Set Frame Type to Plain Frame |
| Using a low-res profile image for 3D | Pixelated or blurry 3D frame render | Use the highest resolution image available |
| Uploading wrong texture for Side face | Depth of frame looks inconsistent | Use a narrow strip of the side texture only |
| Not cropping tightly enough | Extra whitespace appears in the frame | Adjust crop handles closely to the frame edge |
What’s Next?
Artwork Component
Assign your generated frames to Frame option values in your component.
Settings
Configure global settings for your LIVEARf app.